Sunday, March 23, 2014

How to Flip/Mirror a JPEG Image

Do you need to flip/mirror an image? It's simple! There are several reasons why an image would need to be flipped/mirrored, using iron on transfer paper for white/light clothing is just one reason. Here are easy steps for flipping/mirroring an image. I will show you two techniques:

1. Using Preview on a Mac

2. Using Paint on a PC


1. Flipping/Mirroring an Image on a Mac:

Step 1. Save your image to the desktop (or another easily accessible folder).
Step 2: Double click on your image/file. Do not go to any program and open the file, you want to double click directly on the file from either your desktop or the folder your file is in.
Step 3: As a default on a Mac JPEG images should open in a program called "Preview."
Step 4: With the file open in preview go to the Edit option on the toolbar at the top of the image.
Step 5: Drop down the Edit menu and click on the option that says "Flip Horizontal"
Step 6: Your image should now be flipped/mirrored. You will now need to save the image. There are two options when saving the image. You can choose to save over the original image and replace it with the new flipped/mirrored image. To do this simply go to file in the toolbar at the top of the image and drop down to "save" it will automatically replace the old image with the new one. If you do not want to lose your original image then follow the next step.
Step 7: Go to File in the toolbar at the top of the image and drop down, click on "duplicate", You will now have two of the same image.

Step 8: Now go back under "File" and click on "Save." You will be prompted to give the new image (duplicate image) a file name and pick the location where you want to save it. Do this and click on save. Now you have two images, one flipped and one regular.


2. Flipping/Mirroring an Image on a PC:

Step 1: Open the file in Paint (some computers have Paint as the default program and you can just double click on your jpeg image to open it in paint. Others require you to open Paint first and then go to "File" "Open" and find your file.) (You can find Paint by going to your Start menu > all programs>accessories)

Step 2: In the toolbar at the top there is an option that says "Rotate" there is a small arrow next to the word Rotate, drop down this menu to view more options.
Step 3: Click on "Flip Horizontal" and the image will be flipped/mirrored.
Step 4: To save the image go to "File" in the toolbar at the top. Drop down the menu and click on "Save As."You will be given options to pick the format you want to save it as (I chose JPEG).

Step 5: A new window will open asking you to name the file, give it a name and click "save."


*Note: Many computers/printers give the option to print the mirror or flipped version of an image/document when you open your print preview box. This will usually be a small box on the first page next to the preview of an image, or it can be under options such as "Paper Handling." Not all printers/computers give this option, but yours might.


You can find the Chevron Number image on Etsy at StripedGiraffes you can find the Big Sister image on Etsy at StripedGiraffes as well.

Thursday, March 20, 2014

Etsy Shop: AdornablePatterns: Instant Download Applique Patterns

Patterns to create your own appliques and other creative projects. https://www.etsy.com/shop/AdornablePatterns
ImageImageImage

Tips: How To Re-Size a PDF Document/Image

 Image
You purchased a PDF instant download pattern but the image is too large to fit on your child's shirt, totebag, card.... Now what do you do? Don't worry it is very simple to re-size a PDF.
Using a PC:
Step 1: Open the PDF in Adobe Reader. (You can download Adobe Reader for free online http://www.adobe.com/products/reader.html)
Step 2: In the top right corner click on FILE, then choose PRINT from the drop down menu.
Step 3: The print dialog box will open providing you with several options. To scale the document you will want to find the Page Sizing and Handling section (you may need to go under advanced or options to find this section). Image
Step 4: Click on the Poster option (shown in blue above).
Step 5: Once the Poster option is selected it will allow you to Tile Scale the document to the desired percentage.Type in the percentage you require. You should see the image shrink in the preview box.
NOTE: If you are working with several pages in a pattern be sure to remember the percentage you scaled the document to. You can then print pages individually at the desired percentage (Under Page just enter the page number/numbers desired), or scale down the entire multi-page PDF document using the same method above.
You can scale the document larger as well, just use the print preview box to view the image and determine the size you require.
Find the Pattern shown above on Etsy in AdornablePatterns https://www.etsy.com/shop/AdornablePatterns?ref=si_shop

Tips: How To Use Iron On Transfer Paper for Bright/Dark Material

You found an image that you love and now you want to turn it into an iron on transfer, but you don’t know how. Don’t worry! I’ll show you in a few easy steps:
What you’ll need: Inkjet Printer, Iron on Transfer paper for Dark/Colored/Bright material, Any color (white, black, bright or light colored) shirt or clothing, bag…, scissors, iron, parchment paper (usually comes in the transfer paper packet) and a hard surface.
Step 1: Find an image that you want to use: When using iron on transfer paper for dark/colored/bright material you need to keep in mind that the paper background remains white once ironed. To avoid having an 8.5×11 white square on your shirt/bag.. you will need to cut out your image. Using just text can be extremely tedious and you will need to use scissors and an xacto knife. I 
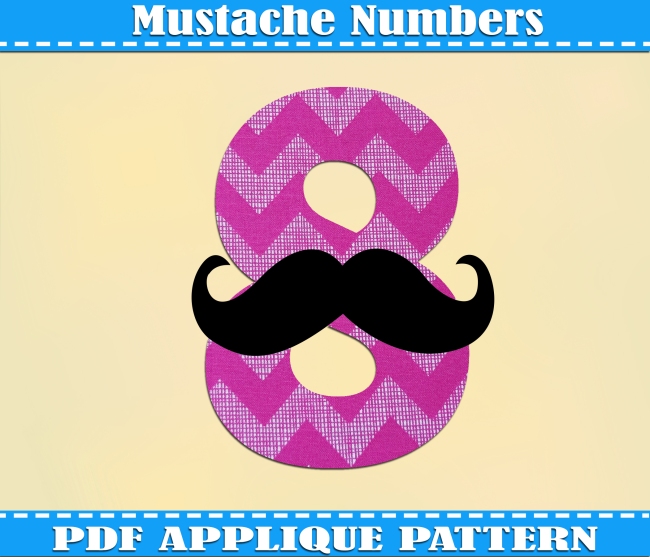
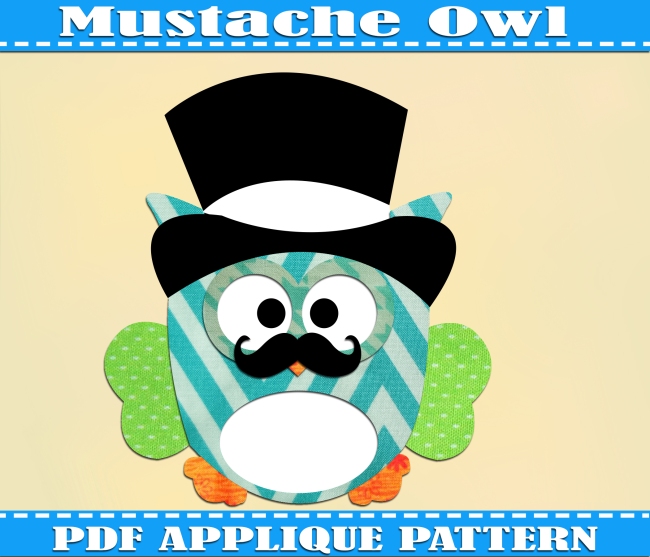
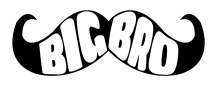
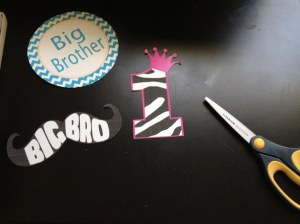
recommend using an image that is closed such as a circle, mustache, number… That way it is very quick to cut out the image.  Some examples 
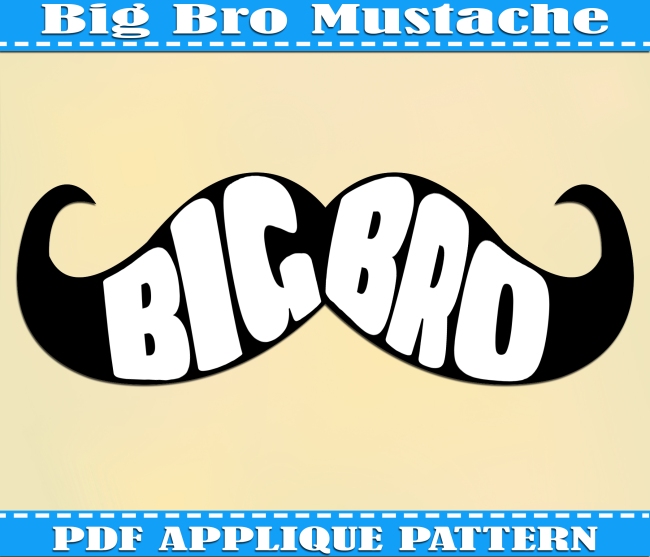
of good images to use:
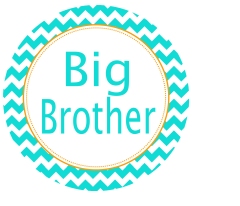
bbmustachejfjf
You can see how both images have text yet are enclosed in a shape to allow the image to be cut out. Because the background of the transfer paper remains white the text in the mustache and the inner white circle in the chevron circle will remain white even if ironed onto colored shirts.
You can use text  if you pick the right design, for example the 2013 image below would be easy to cut out and you would only need the xacto knife to cut out the inner circle of the 0. However the quote below would be impossible to cut out:
2013-crown-nowmlargeincome4-6-nowm
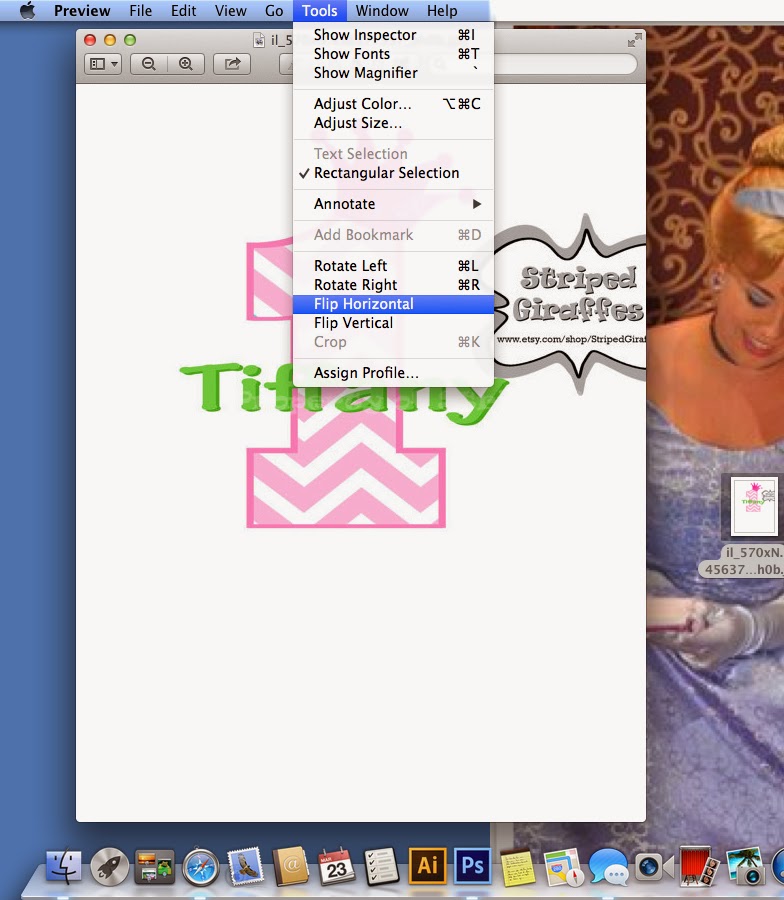
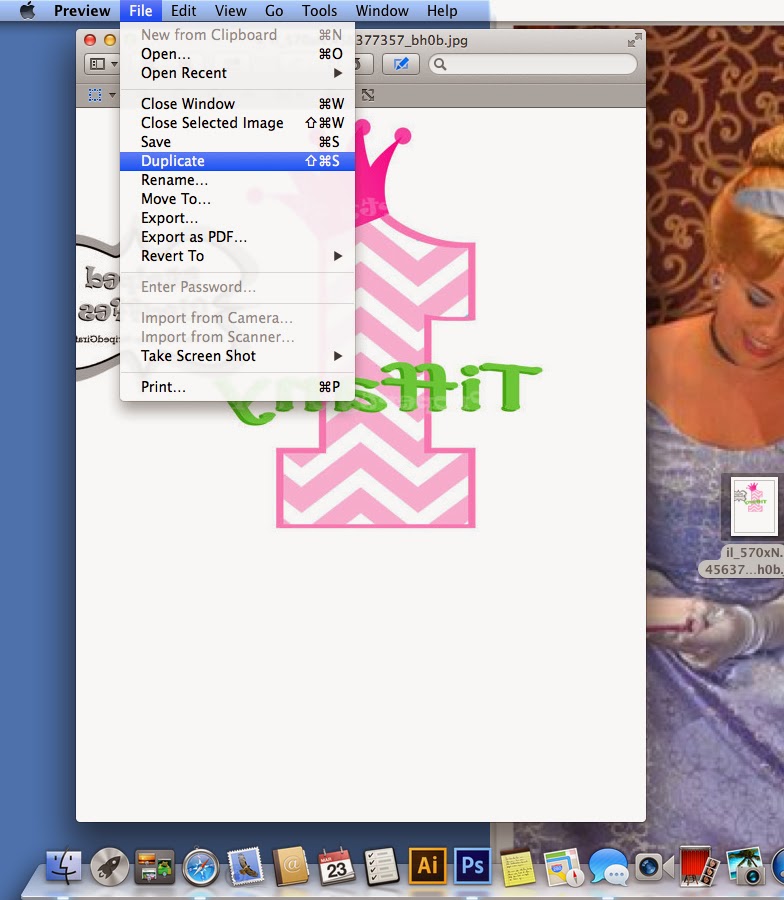
Step 2: Be sure your image is not mirrored/flipped. Unlike iron on transfer paper for white/light clothing your image for iron on transfer for dark/colored/bright clothing does NOT need to be mirrored/flipped. If you purchased an image that is sent to you mirrored you can easily mirror the image back to it’s original orientation. There are a few ways to accomplish this: 1. Use your print preview- When you go to print and select print preview sometimes your print preview box will include a small box you can check that says “print mirror image, or print reverse.” This would flip your image back to regular orientation 2. In your printer settings under page layout you can select mirror (which would mirror the image back to regular orientation. 3. If you don’t see either of those you can open the image in Paint on a PC. In the tool bar at the top of the screen you can click on the arrow next to “rotate” and drop down the menu and click on “flip horizontal.” On a Mac if you open the image in Preview you can go under edit and mirror the image back to it’s regular orientation.
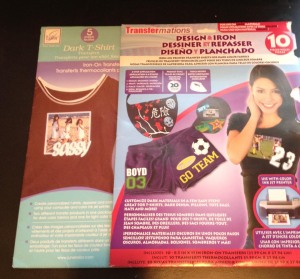
Step 3. Purchase Iron on Transfer paper for Dark/Colored/Bright clothing. I purchase mine at my local craft stores. Michaels, Joanns and Hobby Lobby have great options and you can find coupons online. You might want to pick up your shirt/fabric there as well. Some brands include: Transfermations, Taylor and Jolee. Be sure the package says for Dark/Colored/Bright clothing/material and not white/light.
photo-27
Step 4. Insert the paper into your printer. You need to use an INKJET printer, you can not use a laser printer. The paper instructions will tell you how to insert your paper so it will print correctly. Usually there is a line down the middle of the paper on one side. You want to print on the opposite side of the line. You can test which way your printer handles the paper by putting a small x on a regular piece of paper and printing a test image. Make note of how your paper is handled so when the image prints it is on the correct side of the paper.
Step 5. Print your image. Always use Print Preview when printing your image. The preview that is shown of your image is how it will look once printed. Remember you want the image to NOT be mirrored/flipped. If the image is not fitting in the print preview box correctly do not print. Use the scale or fit to page option until you are happy with the image you see previewed. Then print.
Step 6. Cut out your image. Iron transfer paper for Dark/Colored/Bright clothing/material needs to have any excess white cut off of the image before ironing. The background will NOT become clear as with the iron on transfer paper for white/light material, so please keep this in mind. Cut out the image completely.
photo-20
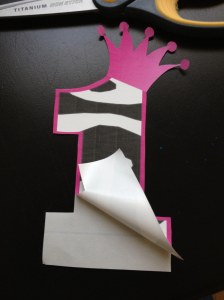
Step 7. Peel off the backing from the image: Carefully peel the white paper backing off of the image.
photo-19
Step 8. Set up your iron: When ironing be sure that there is no water in the iron. You need to use a hard surface like a piece of wood. Do not use an ironing board. Heat the iron to medium/high and pre-iron your shirt/material.
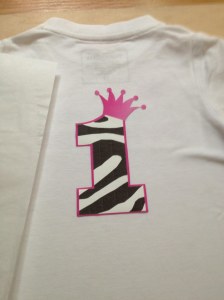
Step 9: Lay the Image on the Shirt/bag… Lay the image onto your shirt so the colored/printed side faces up. See picture below for example:
photo-23
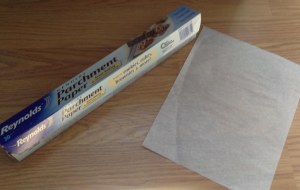
Step 10: Cover image with parchment paper: The iron transfer paper should come with sheets of parchment paper. However sometimes if you use a printer that has too much ink the parchment paper can get messy and not be able to be reused. You can purchase extra parchment paper at the grocery store. Just cut a sheet to fit over the image. Be sure that no area of the image is left exposed.
photo-24photo-18
Step 11: Ironing on your image: Now you are ready to iron. Press down on the image and hold for approx 20 seconds. Then lift, move and press down again for 20 secs…. You do not want to run the iron over the image like you would normally iron. Lift the parchment paper and check the edges of the image to be sure they are stuck on tight to the shirt. If not recover and iron more. Go over all areas at least once, maybe twice.
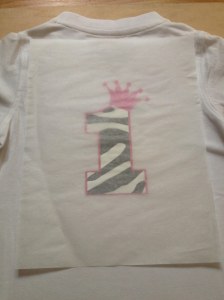
Step 12: You’re Done! Lift off the parchment paper and let the image cool for a few minutes flat. Now the image is on and ready to be shown off! You can find this image and the Big Brother Chevron circle, Big Bro Mustache, 2013 and the quote at: Zebra Number 1: https://www.etsy.com/listing/150429427/first-birthday-pink-zebra-one-crown?ref=shop_home_active&ga_search_query=zebra%2Bnumber Big Brother Chevron Circle: https://www.etsy.com/listing/155975712/big-brother-chevron-printable-bodysuit?ref=shop_home_active&ga_search_query=big%2Bbrother  Big Bro Mustache: https://www.etsy.com/listing/152208782/big-bro-mustache-printable-bodysuit-iron?ref=shop_home_active&ga_search_query=mustache 2013: https://www.etsy.com/listing/160251905/2013-crown-princess-pink-bow-printable?ref=shop_home_active&ga_search_query=2013 Quote: https://www.etsy.com/listing/160870892/jane-austen-digital-printable-4×6-print?ref=shop_home_active
photo-25

Find applique patterns at https://www.etsy.com/shop/AdornablePatterns

Tips: How To Use Iron On Transfer Paper for White/Light Material

photo-13a
You found an image that you love and now you want to turn it into an iron on transfer, but you don’t know how. Don’t worry! I’ll show you in a few easy steps:
What you’ll need: Inkjet Printer, Iron on Transfer paper for white/light material, white/light shirt or clothing, bag…, scissors, iron, and a hard surface.
Step 1: Find an image that you want to use
preschoolprincess-nowm
Step 2: Mirror/flip the image. Most iron on transfer papers for white/light material need the image mirrored/flipped. There are a few ways to accomplish this: 1. Use your print preview- When you go to print and select print preview sometimes your print preview box will include a small box you can check that says “print mirror image, or print reverse.” 2. In your printer settings under page layout you can select mirror. 3. If you don’t see either of those you can open the image in Paint on a PC. In the tool bar at the top of the screen you can click on the arrow next to “rotate” and drop down the menu and click on “flip horizontal.” On a Mac if you open the image in Preview you can go under edit and mirror the image. preprinc
Step 3. Purchase Iron on Transfer paper for White/Light clothing. I purchase mine at my local craft stores. Michaels, Joanns and Hobby Lobby have great options and you can find coupons online. You might want to pick up your shirt/fabric there as well. Some brands include: Transfermations, Taylor and Jolee. Be sure the package says for White/light clothing/material and not Dark/colored or Bright.photo-5
Step 4. Insert the paper into your printer. You need to use an INKJET printer, you can not use a laser printer. The paper instructions will tell you how to insert your paper so it will print correctly. Usually there is a line down the middle of the paper on one side. You want to print on the opposite side of the line. You can test which way your printer handles the paper by putting a small x on a regular piece of paper and printing a test image. Make note of how your paper is handled so when the image prints it is on the correct side of the paper.
Step 5. Print your image. Always use Print Preview when printing your image. The preview that is shown of your image is how it will look once printed. Remember you want the image to be mirrored/flipped. If the image is not fitting in the print preview box correctly do not print. Use the scale or fit to page option until you are happy with the image you see previewed. Then print.
Step 6. Cut out your image. Iron transfer paper for white/light clothing/material is great to use with images that contain a lot of text. Unlike other transfer papers you do not need to cut out every letter. The background of the paper will become clear once ironed on leaving only the image. However since the background becomes clear it can have a bit of a shiny look so I recommend cutting out your image as close as possible so any excess is gone. On one side of your image leave a tiny bit of excess to allow you to peel off the backing more easily once ironed on.
photo-6
Step 7. Choose your shirt/material/item. When using iron transfer paper for white/light clothing you need to use a shirt or material that is either white or very very light. You can not use dark fabrics. If you are unsure if the shirt is too dark do a test on the inside of the shirt before ironing on your actual image. Cotton works best. If you use a shirt with ribbing it can make the image hard to stick. Tight clothing can cause the material to pull off of the image once stretched.
Step 8. Set up your iron: When ironing be sure that there is no water in the iron. You need to use a hard surface like a piece of wood. Do not use an ironing board. Heat the iron to medium/high and pre-iron your shirt/material.
photo-7Step 9. Ironing on your image. Lay the image face down so the colored/printed side is laying flat on the shirt.
photo-8
Now you are ready to iron. Press down on the image and hold for approx 20 seconds. Then lift, move and press down again for 20 secs…. You do not want to run the iron over the image like you would normally iron. Check the edges of the image to be sure they are stuck on tight to the shirt. Go over all areas at least once, maybe twice.
Step 10. Peeling off the backing from your image. This is the trickiest part. Wait until the image has cooled at least 30 seconds. Start with the excess that I told you to leave in part 6. Use your finger nail to separate the iron transfer stuck to the shirt from the paper backing. You can slightly rip the paper backing to get the peeling started. Peel off very slowly. If any of the image starts coming up stop, lay the backing back down and iron over it again.
photo-10photo-11
Step 11. You’re finished!! Now the image is on and ready to be shown off! You can find this image and the Kindergarten Princess image at https://www.etsy.com/listing/161126307/preschool-princess-printable-school-iron and https://www.etsy.com/listing/154683454/kindergarten-princess-printable-school?ref=shop_home_active
photo-12
Find applique patterns at https://www.etsy.com/shop/AdornablePatterns